Be it for commuting in a busy city wasteland or browsing the sidewalk at your native park, electrical skateboard has slowly advanced from the faculty lab to the web market place. Now is a superb time to play with various types of transportation for enjoyable and freedom to discover your world in new methods.
If you’re trying to buy your new mode of transportation, there are a ton of fine websites to discover a able to experience an electrical skateboard. You possibly can go to Lacroixboards.com, Backfireboardsusa.com, Meepoboard.com, Wowgoboard.com and even Amazon.com to seek out any variety of boards to fit your wants and price range.
This text is supposed for the adventurous tinkerer who enjoys stepping into the heart of a venture, the studious experimenter, and even the old fashioned skater or landlocked surfer trying to renew their love of the experience. So let’s leap into it, within the electrical skateboard DIY information.
Which Type of Electrical Skateboard to Construct?
That is necessary, as there are just a few totally different types of an electrical skateboard.
City Electrical Skateboard
This fashion of a skateboard is usually transformed old fashioned decks, penny boards, or shorter longboards with giant road wheels, inflatable wheels, or stable airless AT wheels with road treads. Most use hub motor, single or twin belt drives, and even direct drives just like the Revel package. These smaller boards are used quite a bit on faculty campuses, and as commuters for work. Good steady boards with modest speeds and nice vary. They don’t take up a number of area and are straightforward to hold.
Electrical Avenue Skateboard
Feeling adventurous? Avenue eboards are constructed from commonplace longboards, smaller downhill boards, and AT boards utilizing urethane road wheels. These are typically sooner boards with wider vans for larger velocity stability and sliding enjoyable. These boards will function twin belt drives, direct drive, and even gear drive. They function high-speed motors and really streamlined setups. Rides like these generally is a little difficult for inexperienced or new skate boarders. Surfers have even put particular experience plates on these boards to recreate the surf carving expertise when cruising round city.
Electrical AT (All-Terrain) Board
These are mountain board fashion skateboards with giant inflatable knobby tires, totally suspended vans, enormous top-mounted battery packs, and totally enclosed ESCs, with twin motor and even four wheel drive motors. These motors are normally excessive torque belt pushed, chain pushed, and even gear to gear drive trains. A few of these beasts include bindings to maintain your toes in place if you happen to plan on catching a ton of air. These boards are extremely highly effective with enormous quantities of torque all designed to get you up and down the mountain as quick and as enjoyable as attainable.
Electrical Downhill/Uphill Racer
That’s proper I stated racer. These boards FLY. The women and men who experience these boards achieve this carrying full leather-based motorbike gear and helmets. These boards race above 50 – 60 mph and are being pushed even sooner. These riders race up and down a few of the scariest canyons within the west. These boards function the most effective and quickest motors, batteries, and ESCs the business at present gives. Solely essentially the most skilled riders ought to try and tame these ponies.
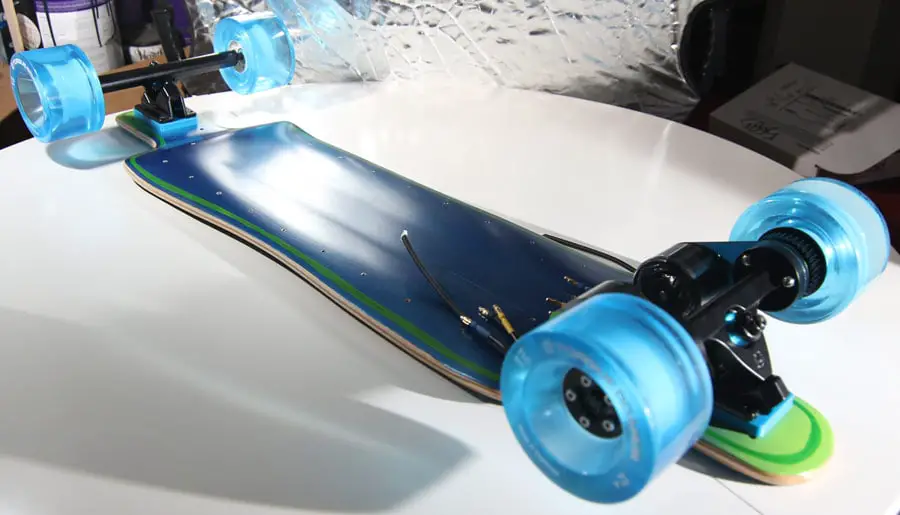
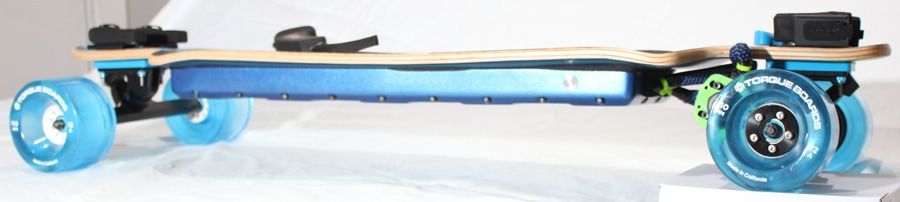
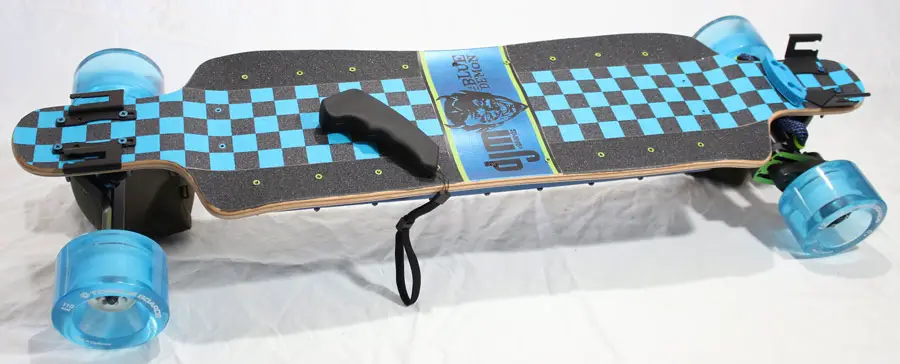
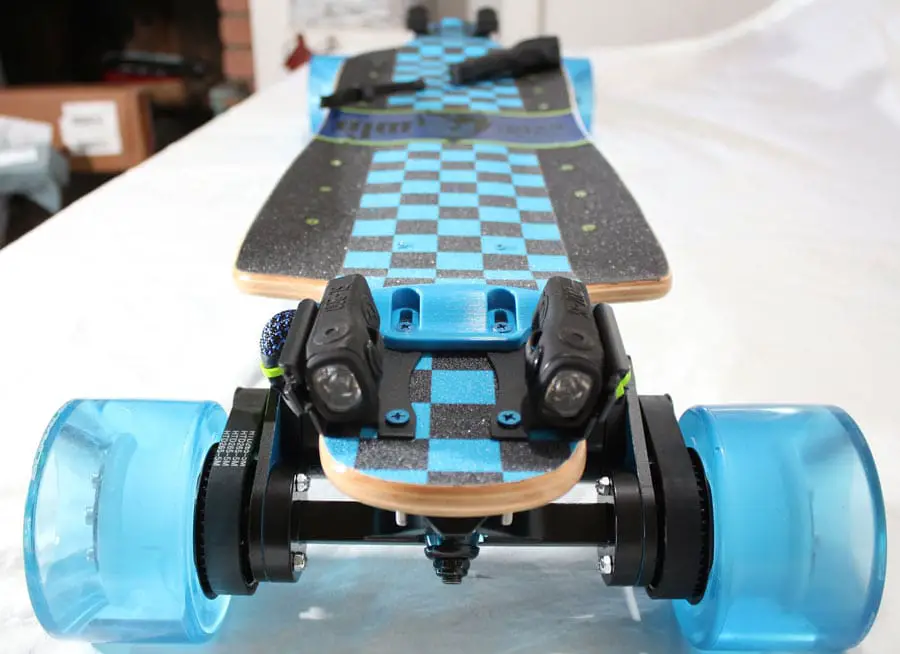
For the aim of this text, we’re going to construct a Twin Belt-Drive Avenue Board.
Right here is the Electrical Skateboard DIY Elements record:
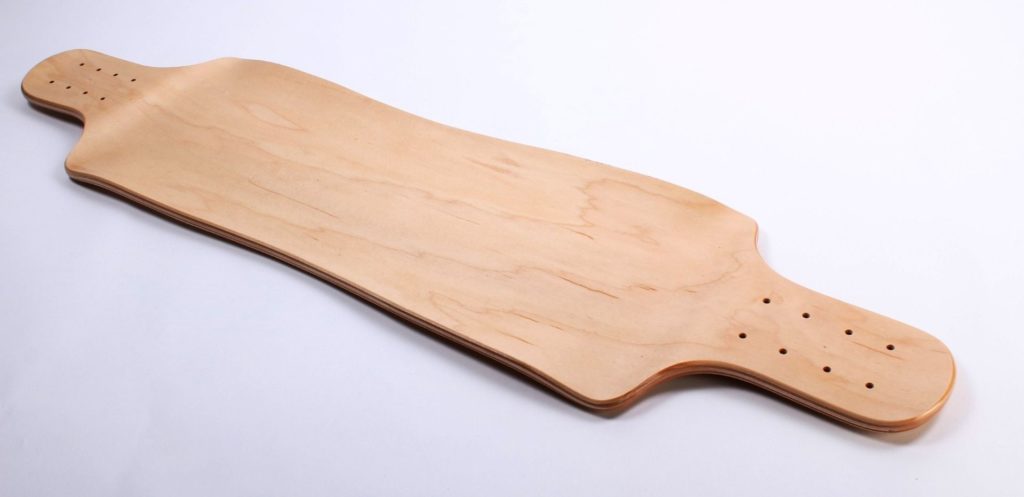
- Deck:
Longboard Skateboard deck. 41 inches prime mount. This deck is a 9ply maple deck discovered at skateshred.com together with a ton of different nice selections. Select a board with at the least a 31” wheelbase between the vans. Take a look at our information on electrical skateboard decks for more information on eskate deck types and selections.
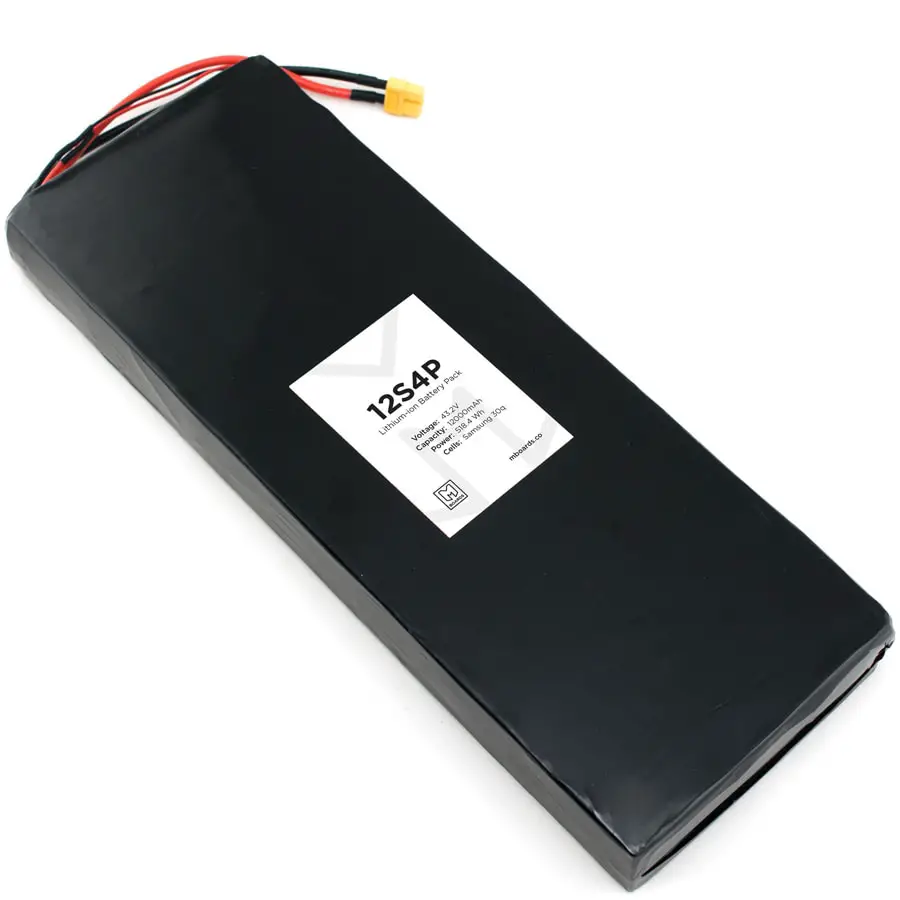
- Battery:
Excessive energy 12S4P Battery. This battery is constructed by the individuals at Mboards (mboards.co). It features a matching battery charger and has a pre-soldered XT60 connection. The most costly a part of your construct indisputably is your batteries; select properly. There’s a ton of excessive energy in these very small packages. In the event you purchase, select a good vendor or dwelling builder/rider who comes on a rock-solid suggestion. You may also strive your individual hand at constructing. Improperly constructed, they’ll begin fires. A lot warning is urged when connecting batteries. Take a look at our information on electrical skateboard batteries to study extra about a very powerful a part of your experience.
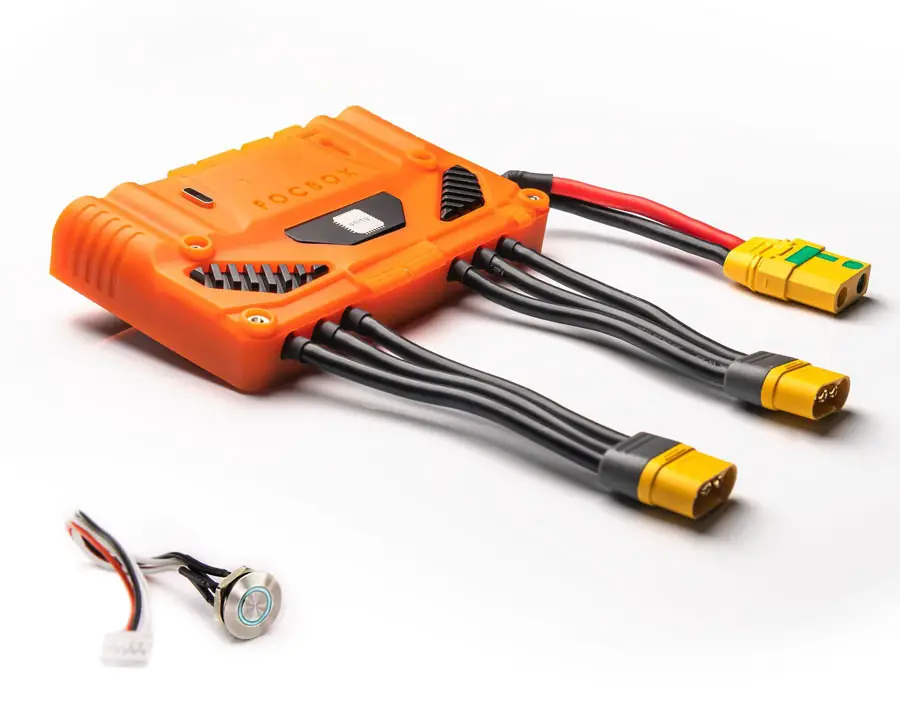
- ESC (Digital Pace Controller)
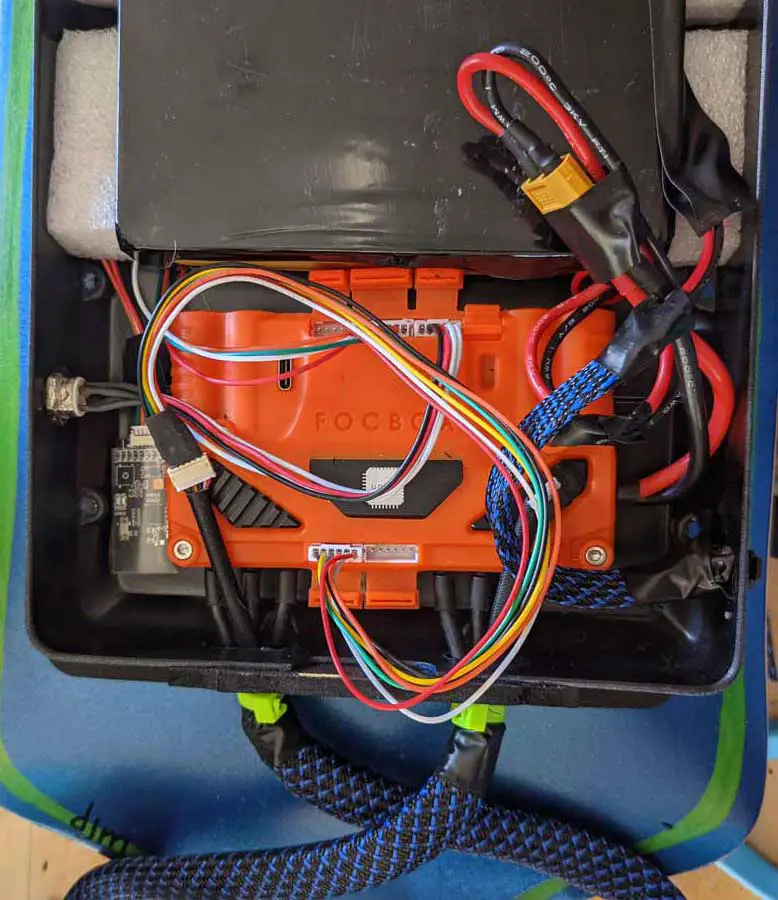
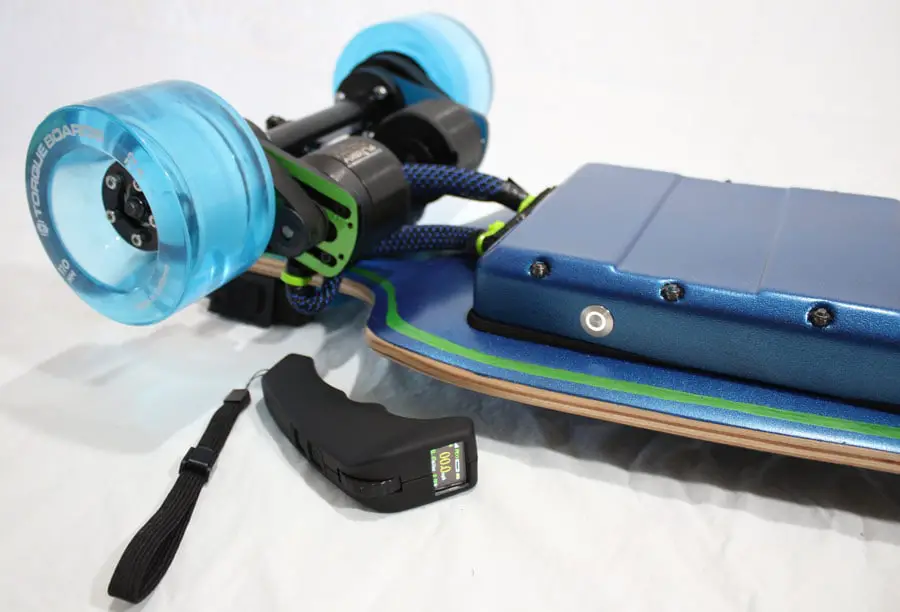
FocBox Unity Twin electrical velocity controller. This unit consists of built-in Bluetooth and has a built-in straightforward setup or you possibly can dive into the VESC programming relying in your ability set. You could find the Unity at a number of on-line retailers. Different nice ESCs are the Flipsky 6.6Plus Twin FESC (flipsky.internet), Stormcore Twin ESC (lacroixboards.com), or the BKB Zenith by Construct Package Boards (buildkitboards.com). In case your ESC doesn’t have built-in Bluetooth, purchase a Bluetooth adapter. Programming your ESC is means simpler utilizing your smartphone or not being plugged into your laptop computer.
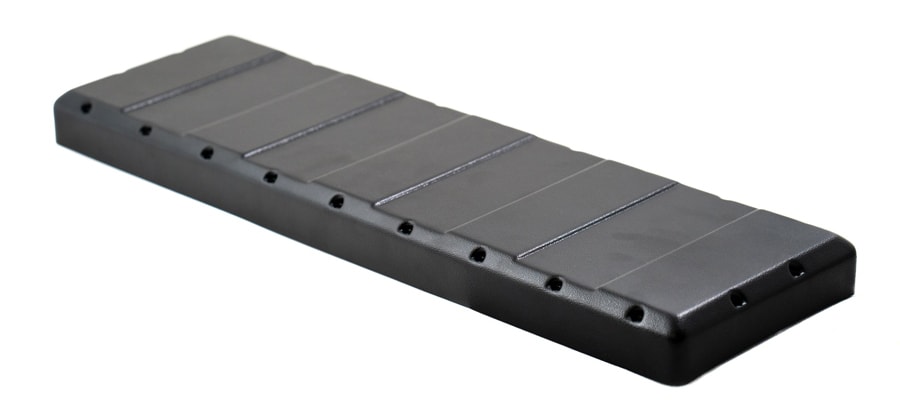
- Battery and ESC enclosure:
For this construct, we will likely be utilizing the brand new and far improved XL enclosure from MBoards. This enclosure comes with its mounting bolts and precut gasket seal to assist maintain out moisture and grime. In case your enclosure doesn’t have its personal mounting system, use 6 – 1 ½ inch 10×32 mounting bolts at the least. Too many bolts, or too stiff of an enclosure and you’ll have an effect on your experience, or presumably crack the enclosure and injury the electronics.
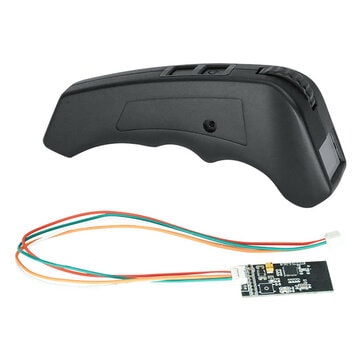
- Distant management:
For this construct, the VX2 from Flipsky meets the necessity. The rugged Flipsky remotes can take some injury and the VX2 options onboard telemetry and speedo when linked correctly. The cheaper VX1 is an usually copied business commonplace and in addition works nice. Hoyt Skate makes an incredible one formed like a hockey puck that matches within the palm of your hand. No matter distant you select, there are a number of choices on the market for you so long as you’ve the receiver and a suitable port in your ESC.
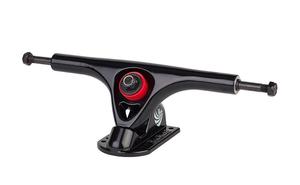
- Vans:
Skateboard vans. Type is dependent upon how you propose to experience. Take a look at our information on electrical skateboard vans for more information. The vans for this construct will likely be super-wide, reverse kingpin, caliber fashion vans.
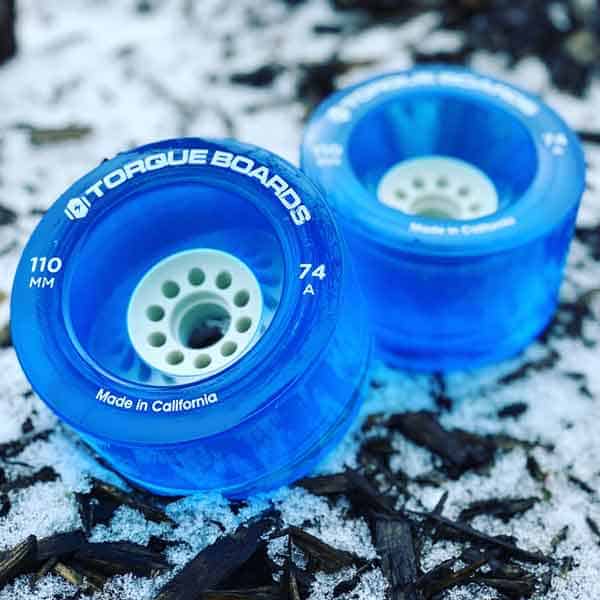
- Wheels:
Torqueboards 110mm urethane 79 Duro skate wheels with kegel hub and adapter discovered at (diyelectricskateboard.com) . There are such a lot of, many different types of wheels offered by so many, many alternative corporations. Take a look at our information on electrical skateboard wheels for more information on this rising part of electrical skateboarding.
- Bearings:
Bones Reds wheel bearings. Since I additionally “analog” skateboard, these are a private selection. There are lots of manufacturers on the market. These generally is a essential a part of your experience relying in your surroundings, take a look at our information on electrical skateboard bearings to study extra about skateboard bearings.

- Pulleys and belts:
Belt size will rely in your construct. For this construct, we will likely be utilizing a 36 tooth Kegel pulley and an 18 tooth 8mm Vanpro drive pulley on the motor. The belt dimension needs to be round 375mm for this setup. Go to diyelectricskateboard.com, mboards.co, or the vbeltguys.com to order belts.
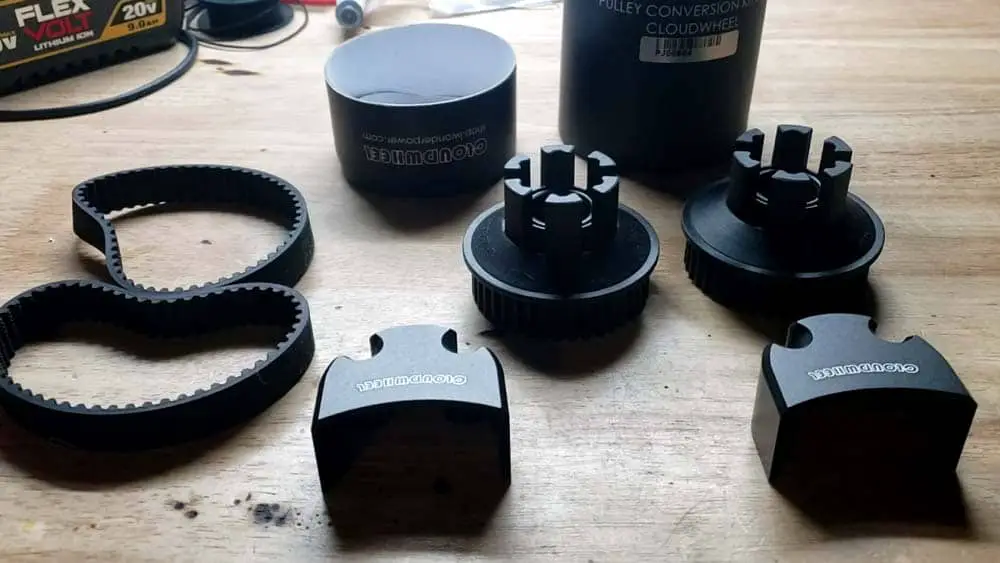
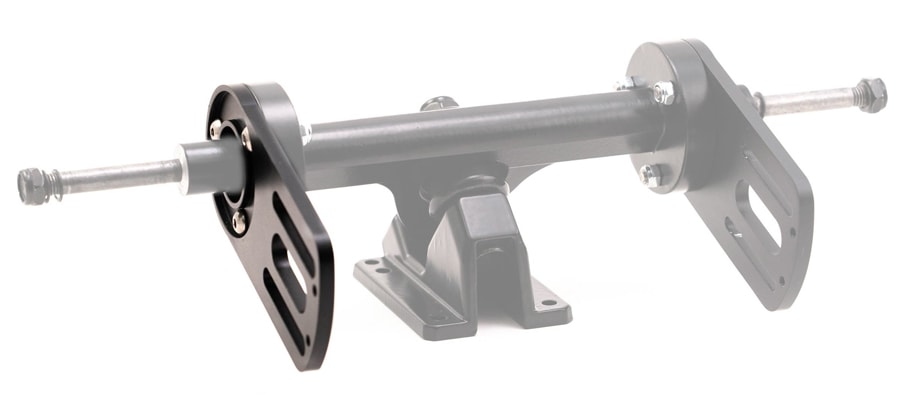
- Motor mounting plates:
Mounting Plates for motors. The Mboards mounts getting used are simply adjustable to assist with pulley rigidity and have a mounting system that doesn’t slip. There are a ton of choices on the market. Different nice choices embody mounts from Flipsky, coloured anodized units from Torqueboards, Sturdy variations from BKB.com, or standard manufacturers similar to Evolve. You may also make your individual from any chunk of metallic you possibly can work together with your fingers or CNC mill.
- Mounting bolts:
10×32 1.5in Mounting bolts for the vans. Use longer bolts, 2 to three inches, if you happen to intend to make use of lights like Shredlights. I want to make use of chrome steel bolts from the native ironmongery shop as they don’t rust. In the event you really feel artistic you possibly can paint the heads.
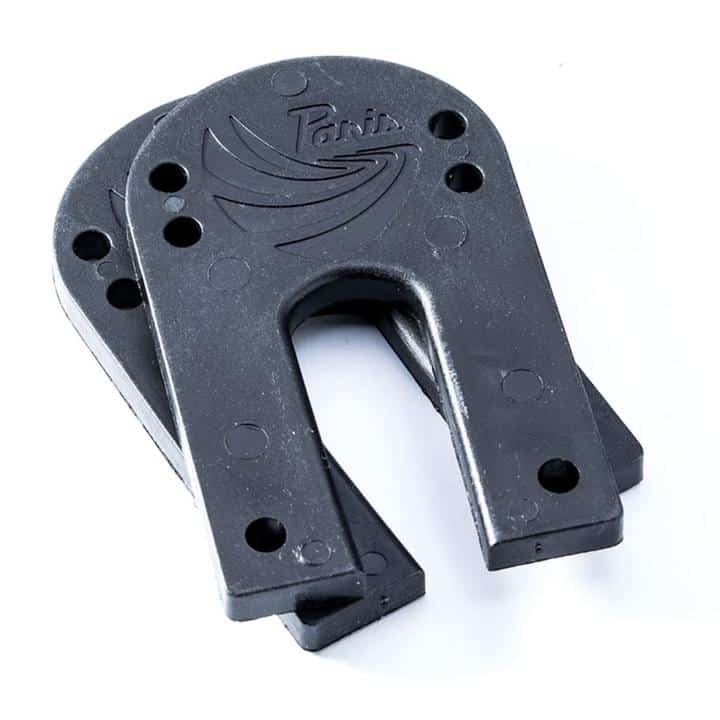
- Riser Pads:
½ inch Riser pads. 1/4inch excessive is a minimal to assist forestall wheel chew with ½ inch being the perfect. If you’re constructing AT setups you’ll NEED wedge risers. Use rubber for extra shock absorption. Pads can be 3D printed in PETG. The pads on this construct are 3D Printed utilizing PETG.
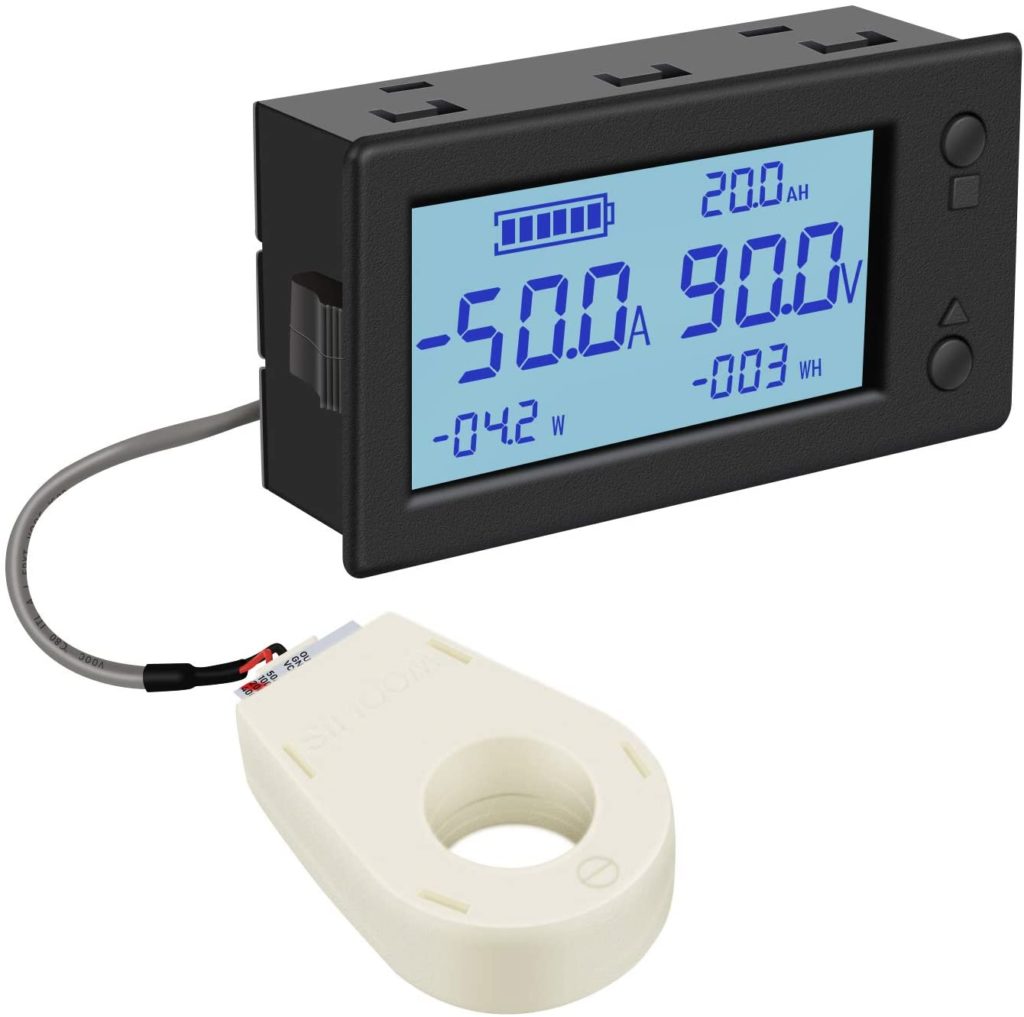
- Battery Meter (OPTIONAL):
The one used for this construct is the DROK battery meter with on/off and Battery Temp Sensor.
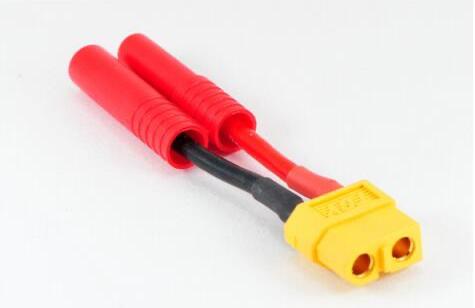
- Connectors:
4mm bullet & XT 60 connectors. The Focbox Unity has these pre-soldered and hooked up on their ESC. So no soldering will likely be required. Nevertheless, some ESCs similar to those from Flipsky would require soldering connectors to connect to motors. For All Terrain electrical skateboards, you could need to go to the bigger 5mm bullet connectors to the motors and bigger XT 90 connectors for energy connections.
- Some Add-Ons:
- Roll – Conduit to maintain motor wires organized. A lot of cool choices to decorate up your experience and maintain your wires and connections clear.
- Roll – 2 inch extensive Velcro.
- Roll – Longboard grip tape or grip materials for the highest of the deck. Let your creativity shine! You may also use the spray grip tape or the epoxy and nice floor sand/glass methodology. No matter works, so long as you possibly can keep in your skateboard.
- Seal materials for the seal between the enclosure and the skateboard deck. The Mboards XL enclosure features a neoprene gasket with its package, however some good choices for different enclosures are yoga mats, skinny neoprene foam from the interest retailer, window foam seal strip, and rubber window seal. This helps maintain vibrations to your electronics down and helps maintain out mud and water from the occasional splash (not waterproof).
Let’s Get Began! Let’s construct an electrical skateboard
Step One
Prep Your Board.
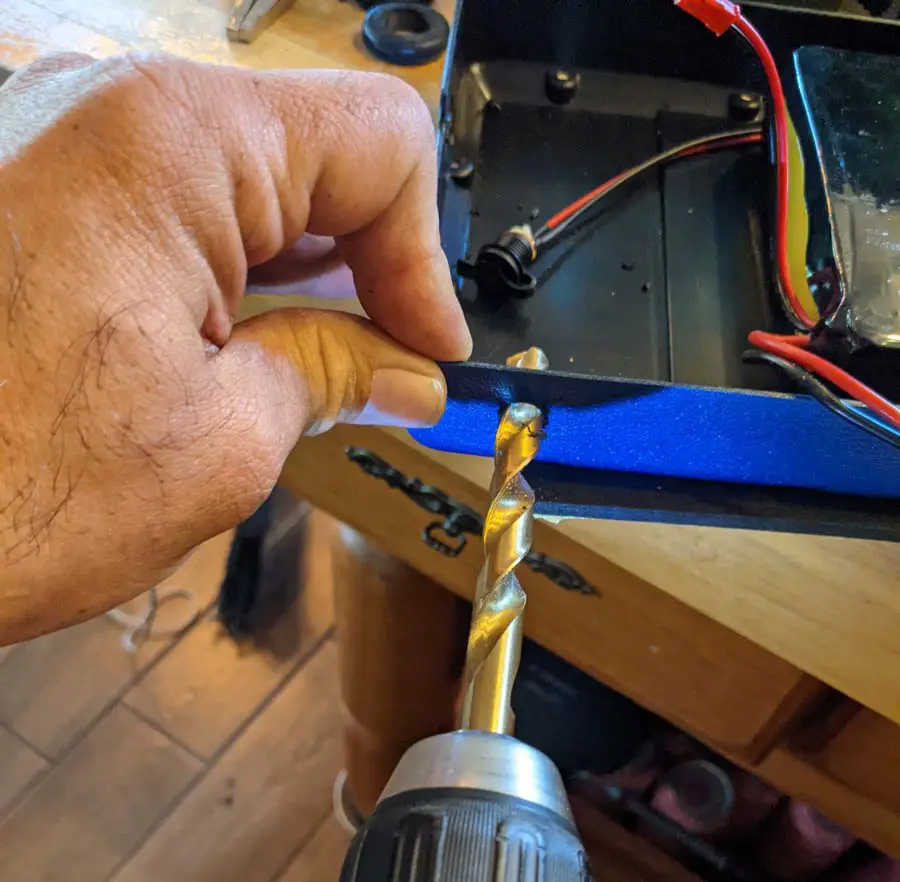
Pre-drill the holes on your enclosure and be sure to have clearance for the motors, mounts, and electronics. That is the place you’ll want to beautify your skateboard. In the event you paint your board, let it dry for just a few days earlier than constructing. You possibly can paint your enclosure presently as properly in order for you. Each will want at the least 3 days to dry. You may also vinyl wrap your board and enclosure. The sky is the restrict.
When your paint is dry or different creative endeavors glad, apply your grip tape and ensure it’s totally utilized with no bubbles earlier than trimming. Re-drill your mounting holes for the vans and the enclosure. When performed, put aside. Cool Trick! Glue down a layer of skinny foam down earlier than your grip tape for a extra comfy experience.
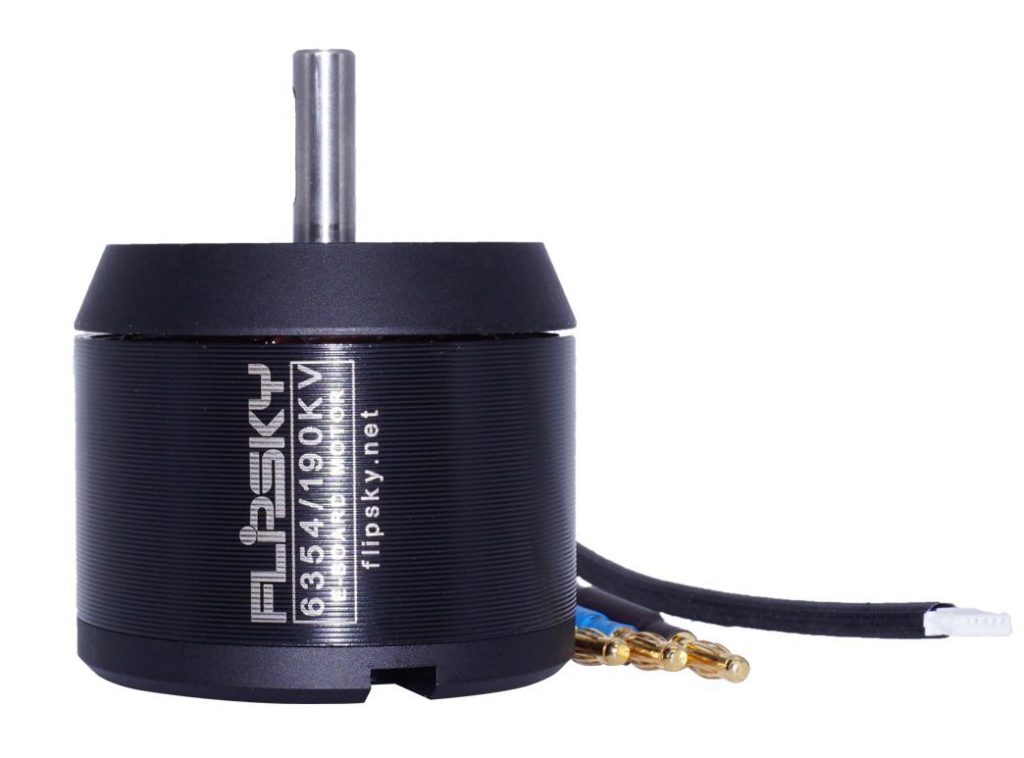
Step Two
Prep Your Motors
Add the motor mounts in your rear truck. Insert the motors into the mounts and set up the drive pulley on the motor however maintain the motor hand adjustable. Do the identical for the opposite mount and motor.
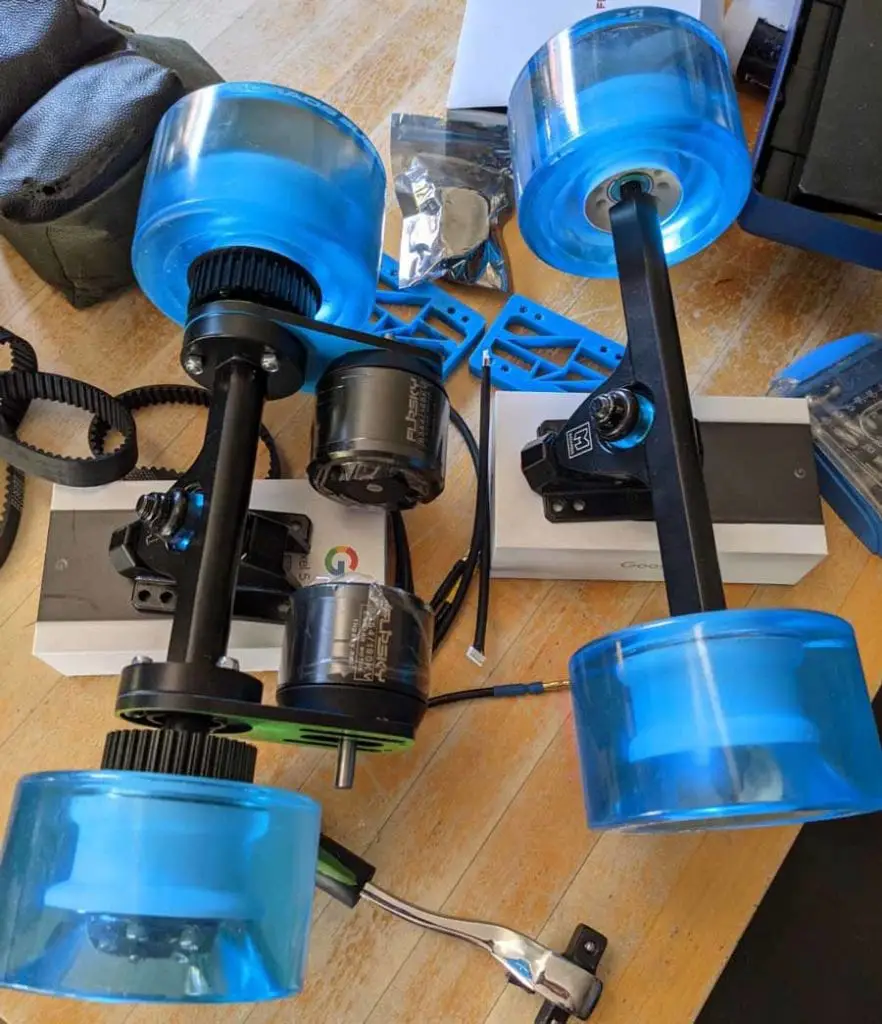
Ensure each motors spin freely and the drive pulley doesn’t drag on the mount.
Add the wheel bearings two to a wheel. Press them into your wheels. A fast option to set up the bearings in tight wheels is to place them on the vans, including the washers, and tightening the axle nut till the bearings seat themselves within the wheel. Repeat for all wheels and put aside.
Set up the Kegel pulleys to 2 of the wheels. Generally the pulleys snap proper in, generally they must be screwed in. In case your wheel pulleys include screws, use them. After mounting the pulleys to 2 of the wheels, mount these wheels to the vans with the motors mounted and provides them a spin. In the event you really feel resistance, regulate your motor mounts and see if you happen to get the clearance you want. Relying in your wheel/pulley/truck combo selection, you will have to grind some materials off of the vans to get the free motion you want. This could occur and will be regular. Simply take your time and take small quantities of fabric off at a time.
After getting the wheels spinning freely, take away them, and apply the belts to the drive pulley on the motor. Slide belt over the wheel pulley as you reinstall the wheel. Now you possibly can regulate the belt rigidity by pulling on both the mount or the motor till the belt tightens. You need unfastened sufficient for a little bit give, however tight sufficient the belt doesn’t slip.
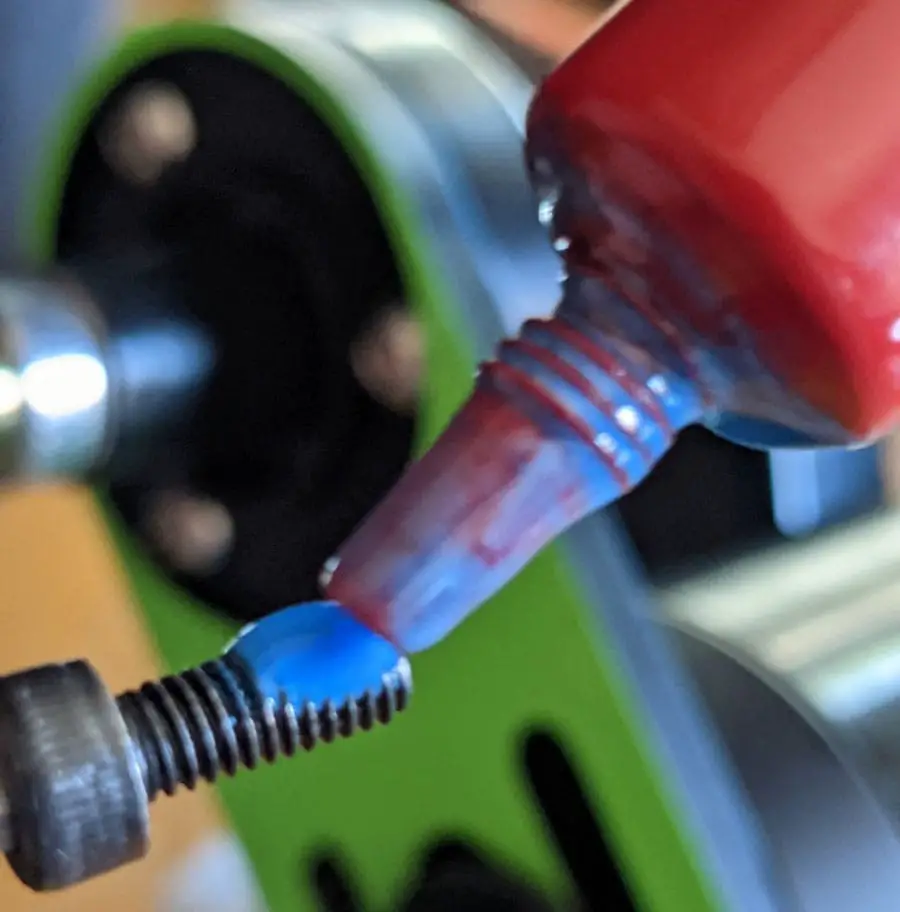
Tighten all of the bolts on the mount and the motor. Verify the stress once more. If all is nice, take away every bolt from the motor one by one, apply thread locker (Like Loctite) to every bolt, then reinstall and tightening. Do the identical for any bolt that doesn’t have a Nylon locking nut.
Repeat for the opposite motor setup.
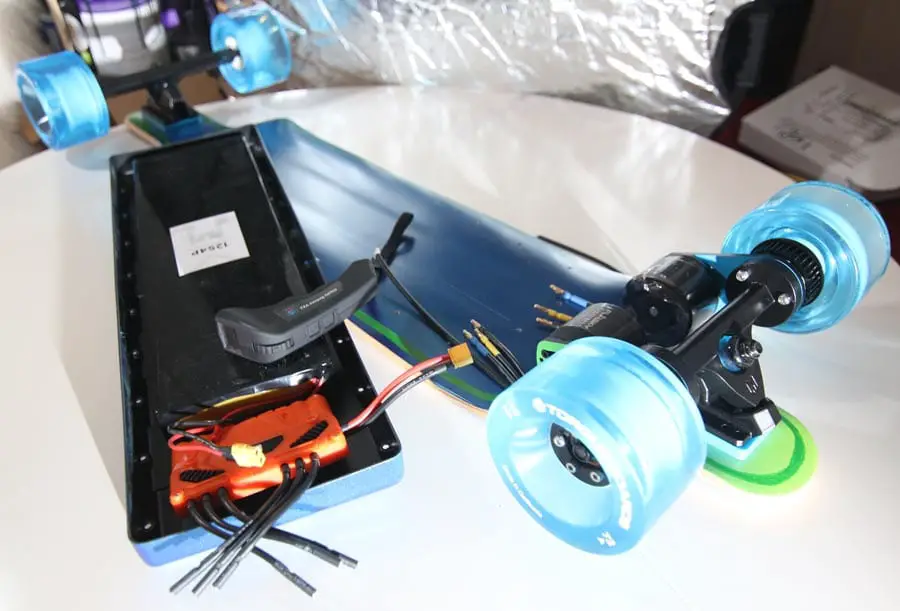
You need to now have a whole drive setup with the wheels on and belts mounted. Mount the finished drive arrange in your skateboard. Add the wheels and bearing to your entrance truck and mount that as properly. Make sure you route the motor wires in a means you possibly can attain the enclosure and never rub on something that will injury them.
Cool Trick: You probably have bung screws or motors in your motor mounts that simply Will Not keep tight it doesn’t matter what you do. Wrap the bolt threads with Teflon tape, earlier than making use of thread locker and reinstalling. It helps maintain the bolts from vibrating unfastened.
Step Three
Construct up the enclosure
DO NOT Join the battery till all electronics have been check fitted and all components are in place.
Take a look at match the battery and ESC within the enclosure, and see how every thing will match. Ensure not one of the wires will likely be kinking or rubbing on something. Take away after becoming.
Pre Drill holes for the ability swap and charger port.
Trim Velcro to suit your battery. Apply the mushy facet of Velcro to the battery and the hook facet contained in the enclosure. Re-mount the battery. Do the identical for the ESC. Reduce into strips for ESC, particularly in case you are utilizing an ESC with an uncovered circuit board. Apply across the warmth sink facet. Re-mount ESC.
Now battery and ESC are safe and shouldn’t transfer round an excessive amount of. In the event you invert the case, they need to keep in place and never fall out.
Add energy swap and thread within the charger port and wire.
Add in your receiver on your distant management. There are usually two types, UART and PPM. UART has many wires and the PPM has solely three. Each will work nice. Simply be sure to join your receiver to the right port on your chosen distant. Observe the wiring directions that got here together with your ESC.
Add a small strip of Velcro to the receiver and discover a place in your enclosure for the circuit board. Ensure the receiver antenna shouldn’t be obstructed or kinked. If it’s a must to add a Bluetooth adapter, add that now and Velcro in place. Connect with port on ESC.
As soon as mounted contained in the case, add a little bit drop of sizzling glue to energy swap threads and charger port to maintain them from vibrating out of the enclosure when driving.
Join the ability swap to ESC, and join the charger wire to the BMS wires of your battery.
You probably have it, now could be the time to wire in your battery meter per its directions. This will likely require soldering.
Put enclosure on the skateboard deck going through up so that you see contained in the enclosure.
Take one bunch of motor wires from one motor and cross them to the opposite facet of the enclosure and hook up with that facet of the ESC by connecting the bullet connectors, don’t fear in regards to the order of the wires, all of them work the identical. Every motor additionally has a set of wires referred to as Corridor Sensor wires. These inform the ESC the place of the motor at any time limit and area. You need to add this to the wire group as you join them. Ensure the Corridor Sensor wires for a motor, plug into the identical facet of the ESC because the wires for that chosen motor.
Seize the opposite set of motor and Corridor sensor wires and as a bunch cross them over the opposite motor wires and hook up with the opposite facet of the ESC. Wanting down, the wire bunches ought to type an X resulting in the ESC with one set of motor wires over the opposite.
Ensure the ability button is off. Now Join the ESC and the Battery by way of the 2 XT 60 connectors.
Press the ability swap. If the ESC powers on, the lights change coloration from purple to blue, to inexperienced, Success! Which means you’ve linked every thing accurately and are able to setup. If the lights keep purple or don’t energy on in any respect, press the ability swap, disconnect the ability from the ESC and test all your connections. Ensure the battery has a cost, and reconnect to the ESC. Troubleshoot your setup till you’ve energy on and all inexperienced.
Flip off the ability. You at the moment are able to program your ESC, end the ultimate meeting, and go experience.
Cool Trick 1: Wanna go 4×4? Merely join two twin ESC by way of a CAN/BUS cable and now you can have 4 motors for tremendous energy! Simply keep in mind to program the ESC in order that the 2 entrance wheels work in the identical path because the rear wheels.
Cool Trick 2: You can also make a safety “Loop Key” on your skateboard by including an extra XT 60 or 90 connector between the battery and ESC. Merely lower the constructive wire and run the constructive for the battery and constructive for the ESC into every plug, in a single facet of an XT connector. Take the opposite facet of the XT connector and loop a bit of wire from one facet to the opposite. Now while you pull the “key”, you’ll successfully lower all energy to the board. This was used as an Anti Spark connector, however most newer ESCs have anti spark expertise inbuilt so this now serves extra as an affordable safety function.
Step 4
Programming and Working your electrical skateboard for the primary time.
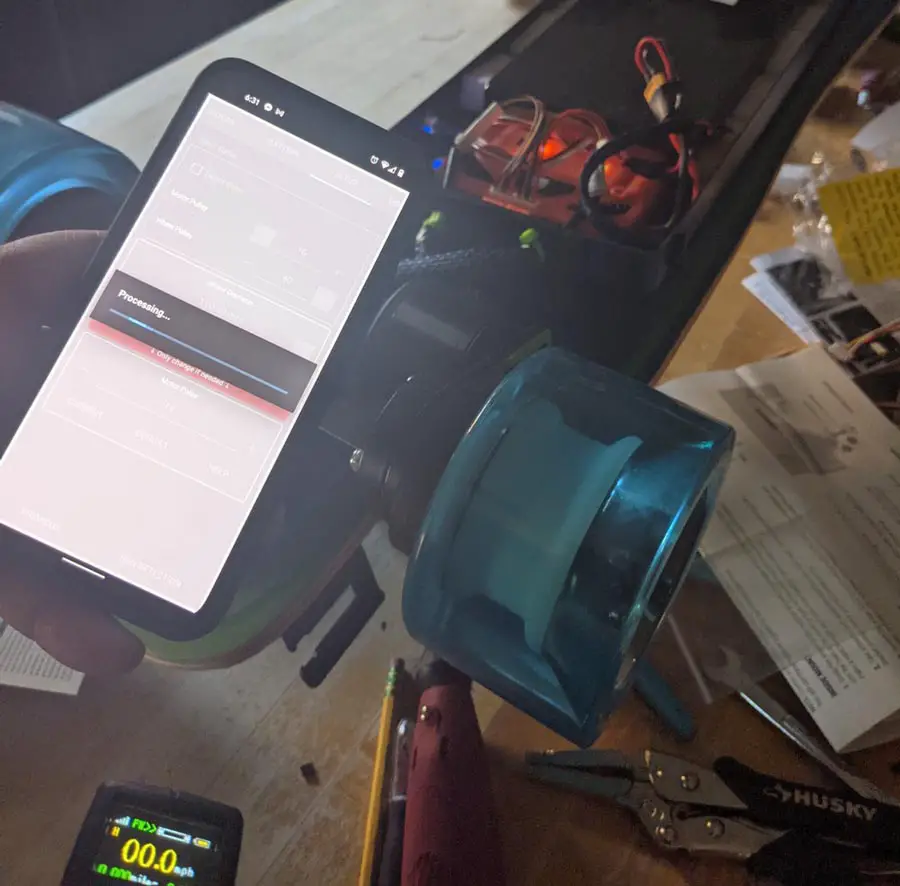
Obtain the VESC Device software program in your laptop computer. Otherwise you generally is a proud donator to the trigger and spend the 99 cents to obtain the VESC Device app to your smartphone. Join your laptop computer by way of the included USB to micro USB twine. I arrange most electrical skateboards utilizing my smartphone and the Bluetooth connection. So this setup is finished utilizing that methodology.
Energy in your skateboard and look ahead to all of the lights to go inexperienced or blue. Ensure there are not any obstructions across the wheels of the drive system, and the belts are linked and tensioned.
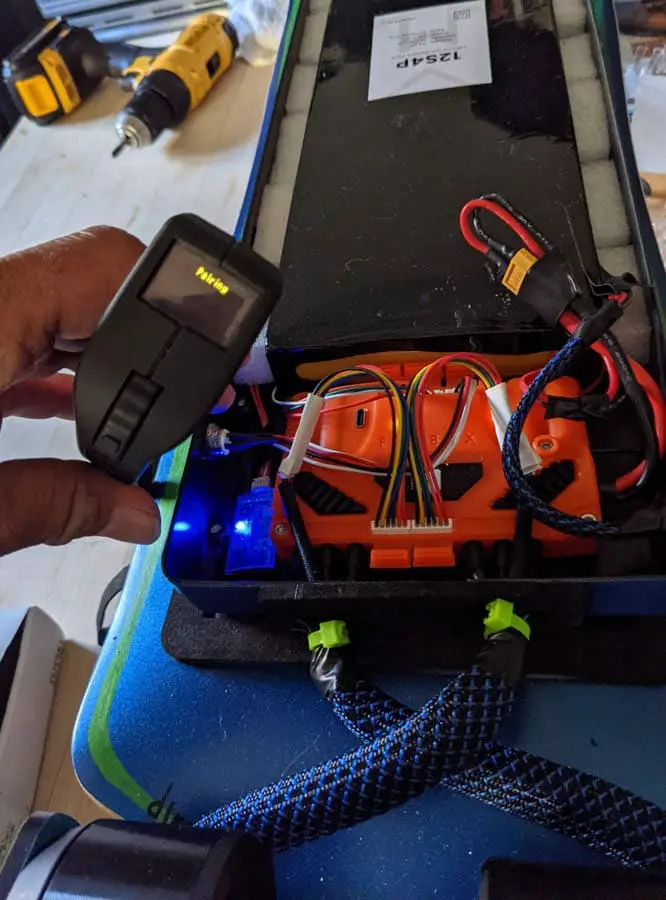
Open the VESC Device app in your cellphone and SCAN on your ESC. When it finds the ESC hit PAIR
Now use the Configuration Wizards to setup
MOTORS (FOC)
INPUT
When the wizard for MOTORS begin you’ll hear a excessive pitched sound out of your motors, that is regular. And excellent news! It means your ESC is working and studying the motors. The motors will spin up in energy and transfer ahead and backward. It is going to do that for each motors. When performed, the wizard will present you the motors and you’ll be requested to decide on the drive path. If the motor doesn’t run in the suitable path, select INVERT and hit OK. The motors ought to now spin the right means. Click on OK and exit the motor wizard.
Enter the enter Wizard and set the fashion of distant you might be utilizing. Most will likely be UART or PPM. Whichever means you linked to your ESC is the fashion of enter you select. Setup your battery information and different information. Then because the wizard continues, it can ask questions that will help you regulate throttle and many others. When you hit your throttle, your wheels ought to begin spinning. If just one wheel spins, don’t fear. The motors work higher when underneath load. So if the throttle connects and works, you might be good to go. Simply make it possible for while you press the throttle, a wheel or wheels spin up.
Whereas programming an ESC can get sophisticated, for essentially the most half, you might be performed with fundamental VESC programming and are prepared to complete meeting and go have a check experience. I do know I’m lacking just a few issues, however on preliminary setup, the ESC and VESC Device will setup to defaults which can work nice for preliminary testing. You don’t have to make any extra changes after establishing motors and controller. You possibly can tweak every thing else after your first experience.
NOTE: Please do a little analysis earlier than diving too deep into the VESC software program. Know that each DIY builder likes to customise their electrical skateboards to their driving fashion, and adjusting your ESC utilizing VESC Device will enable you just about limitless adjustment. So take your time, analysis, and tweak your skateboard in child steps as you experience and evolve.
Flip off the ability, flip the case over and fasten the enclosure to the skateboard.
The crossed motor wires ought to now be in step with its facet of the enclosure. Ensure there are not any pinched wires. Wrap the motor and corridor sensor wires with conduit simply to maintain them organized and clear. Every part ought to now be safe. Tape, zip tie, or in any other case safe the conduit.
Totally Cost your skateboard and distant management batteries earlier than your first experience.
You at the moment are prepared to check your new electrical skateboard.
Step 5
Your First Trip
Motorbike Proverb: Costume for the Crash, not the experience.

You probably have by no means ridden a skateboard or assume you might be able to experience a 30mph plus skateboard with no safety, please take the time to learn this text, https://e-skateboarder.com/best-protective-and-safety-gear/
Discover a big secure space.
Energy On Your Board, then your distant management in that order.
Carry the drivetrain facet of your skateboard and provides the throttle a fast pull. Your wheels ought to spin up.
Smile. You probably did it.
Stand on the board, lean ahead in your proper foot, and ease the throttle. You’ll begin to transfer ahead.
TEST IT!
– As you experience, get a really feel for the board. In the event you really feel wobbly, tighten the vans till you are feeling extra steady however not so tight you possibly can’t flip. Discover your velocity wobble level. That’s the purpose in velocity the place your skateboard vans can’t sustain with the velocity or your fixed correction and you start to lose management and stability. Preserve adjusting your vans to match your present velocity consolation stage. The sooner you go, the tighter the vans must be. So you’ll begin to lose turning energy and carving potential in favor of velocity. Additionally, the bushings will proceed to interrupt in requiring extra changes. Take a look at this text https://e-skateboarder.com/bushings to study extra about how your bushings’ sturdiness impacts your experience.
– Hit the throttle, test the throttle response. Your throttle needs to be snappy. You possibly can tweak within the INPUT Part of the VESC Device
– Let off the throttle at velocity, watch the distant for battery response. It ought to present a small regeneration cost each time you let off the throttle. In the event you don’t get sufficient regeneration, you may make these changes in VESC Device. An excessive amount of regen and your board will endure, so use sparingly.
Cool Trick: You possibly can truly observe your velocity and monitor all your ESC programs if utilizing the VESC Device App in your cellphone whereas driving. It may possibly monitor a complete experience session and give you actual time knowledge.
Go have enjoyable
I hope you loved this construct. I do know I did.
Please take a look at https://e-skateboarder.com for a lot of extra articles on this sizzling new sport/interest/PEV car.